Showing posts with label scenics. Show all posts

Monday, February 15, 2010

Modular buildings

So I am thinking about making a kind of modular building for my kids' new Empire army. Wall panels, gable ends, ceiling panels. Connector pieces (both end to end and inside and outside corners), doors and windows, chimneys.
How tall do you thinkI need to make the walls for a single story? I was thinking 2 inches, maybe 2 1/2 inches.
The plan is to put a layer of sculpting clay onto a pre-cut base of either styrene or thin plywood. Call it about 1/8" thick. Then sculpt the pattern into it. Make an RTV mold of that, and cast in resin.
That's the plan. What about it? I need feedback before I get started.

Saturday, February 6, 2010

European Gothic structures

If you follow my other blogs, you know by now that I have been sucked into the Warhammer world again. It's a great setting, I'll give it credit for that.

But I have virtually NO scenics for the Empire other than generic terrain. I already had a few things for the Lizardmen I was using for VSF, with a similar tropical feel. But half-timbered buildings? Wattle and daub? Nein.

Anyone have easy ways to make these buildings? I will need at least:
  • Tavern or coaching inn
  • Farmhouse
  • Two or three townhomes
  • Barn/stable
  • Outbuildings
  • Sigmarite Shrine

Tuesday, February 2, 2010

RTV Purchased

I bought this past weekend the first RTV I have ever had.

For those of you who don't already know, RTV stands for Room Temperature Vulcanizing. It's a silicone rubber material used to make molds for casting resin, plaster, etc. It generally can NOT be used for lead - the temperature is too high, melting the mold. I believe there are some types that can handle the high heat, though.

What I got was a Smooth-On product, called OOMO 30, IIRC. It mixes in equal parts by volume (easy!). I have read good things about it on the internet, at TMP and other places. Found it at a local art supply store.

So, obviously, the plan is to sculpt up some items, make molds, and get to casting. Some of these things will be scenics related, so I thought I would mention it here. Specifically, I want to create some doors and windows to be attached to buildings, in both 15mm and 25mm scales. It is a pain to try and scratch build them each time, so I am going to try and create some good masters to cast from. Might make some railings, chimneys and such, too. Start simple before trying something ambitious.

Anyway, wish me luck. I have a nasty feeling I am gonna need it. When I get a space cleared to work on it, I'll get to work. Hopefully, pictures and such will be involved as well.

Sunday, February 22, 2009

Photo of the Parrotman Hut


This small birdhouse made a great hut. All I did to it was to stain the raw wood, cut off the original perch and add a wooden step. Finally, I cut a conical piece of the material from underside of a pot-topper and glued it to the roof of the birdhouse.
Presto! Instant primitive hut.

Wednesday, February 4, 2009

Great New Product

Okay, I check out Litko's "Jim's Product Lab" from time to time, just to see what all that madman has gotten up to lately. Some of the things he creates are just too cool.

This time, I think he's outdone himself. They have a modular building line for sci-fi/modern gaming. While I don't need that kind of thing very much on the projects I am working on these days, he just did up (well, I just noticed for the first time, at any rate) a couple of different sets of stairs to be attached to the outside of some modular towers. I absolutely hate making staircases. Despise it. I make a lot of goofus ladders instead. These may change that.

Naturally, they could be attached to the outside of pretty much anything. or the inside if you were detailing the interior.

Anyway, check here to see it. Scroll down the page a little bit. You'll find them.

http://www.litkoaero.com/page/LAI/JIMSLAB

Bookmark it - you're going to want to go back again later. I know that I do.

Saturday, January 17, 2009

Telegraph / Telephone Poles, Construction

Welcome to my latest "How-To" article. This time around, I am going to go through the steps I am taking to build a set of telegraph poles. These could also be used, obviously, for telephone lines or even electrical lines if you wished.

Materials:

1/4" diameter hardwood dowel
1" steel washer (provides weight to help stand upright and allows for magnetized storage)
1/16" x 1/16" basswood strip
1/8 x 1/16" basswood strip
Epoxy putty (I used "Miracle Putty" - you know, the stuff Billy Mays hawks on TV)

Tools:

Craft knife (always use a nice, sharp blade - safety first!)
Cutting mat (mine is marked in inches and centimeters, with a 1/2" grid)
Glue (I used both superglue and Alene's Tacky Glue)


Step One: Cut the poles.

Very simple. Cut the 1/4" dowel into a suitable length. I did mine at about 3" (75 mm) in length, for mainly 15mm gaming. They should still work for 25mm, though a bit squat.


Step Two: Prepare the base.

Take a small lump of the epoxy putty and work the two parts together to activate it. Once activated, it will begin to set, so don't waste time here.

Apply the putty to a washer, forming a mound. Then simply press the base of your pole (which we cut in Step One) into the center of the mound to create a hole for the pole to be glued into later. Gently remove the pole so you don't mess up the hole you just made.


Step Three: Cut and assemble the crossbar and struts.

This is the part that will support the wires (which we are going to leave to the imagination for now, though I have a neat idea for adding them that I may work on later). Take a length of 1/8" x 1/16" basswood strip and cut it to 2" (5 cm).

Then cut two pieces of 1/8" x 1/8" basswood into approximately 1" (25 mm) long, with opposing 45° miter cuts. I didn't bother with a miter box for the cuts, but used the lines on my cutting mat to help align everything.


Make sure it all aligns nicely, forming an isosceles right triangle with the crossbar as the hypotenuse. Then glue the struts to the crossbar and each other.


Step Four: Attaching the crossbar to the pole.

Make a small perpendicular cut in the pole, about 3/8" from the top. Make a second small cut, parallel to the first, 1/8" further down the pole. (Sorry, the photo is blurry.)


Using a sharp craft knife, carve a shallow notch out of the pole between the two lines. The lines will act as stops for the carving and help to keep it neat.


The notch will be where you attach the center of the crossbar. It provides a nice, flat surface to improve glue adhesion. I have not been notching for the struts where they meet the pole, although you certainly could do that as well.

Put a drop of glue on the center of the crossbar and another on the point where the struts meet. Glue the crossbar into the notch and hold the struts against the pole until the glue begins to set.


Step Five: Attaching the base. [No photo]

Once you have the pole and crossbrace assembled, its time to attach the pole to the base. Check to see if the epoxy putty has set. It usually will be ready by the time you have finished all of the other steps. If not, wait a bit longer until it is good and hard.

Simply apply glue to the base end of the pole and insert it into the hole you made earlier. I put glue up the sides of the pole's base as well, to give additional strength, bonding to the bottom and sides instead of just the bottom.


Step Six: Painting. [No photo]

You have some options here. I chose option 1.
  1. Paint the entire pole and base. I used a dark brown spray paint.
  2. Leave the pole its natural color, and paint the base a nice earth tone.
  3. Stain the pole and paint the base afterwards.

Step Seven: Flock the base.

Once the base is dry, paint some thinned down PVA glue onto it. I use cheap throw away brushes for this. I got 150 for $3 at a craft store. Then dip into your favorite flocking blend. I used my generic "sandy/rocky" terrain blend. This makes it useful for both Mars and many places on Earth. Once that dried, I dabbed a little more thinned down PVA on and then applied some static grass (burnt grass, Woodland Scenics, IIRC).


FINAL PRODUCT

One completed telegraph/telephone pole. (Well, it still needs its shot of matte finish to protect it, but you get the idea). Singly, it looks a bit like a cross awaiting its victim (not theologically speaking, just as a rather nasty form of execution that was pretty common in the bad old days), but when placed in a line across your table, it leaves no doubt. Protecting the line is going to be a common scenario goal in the near future, I think.

Tuesday, January 13, 2009

A site I came across...


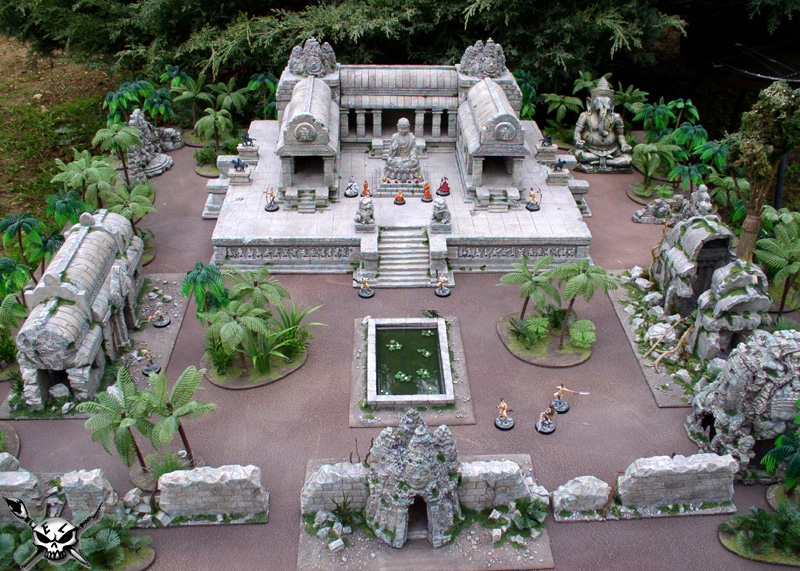
Its called Chicago Terrain Factory. Its quite impressive, and the jungle temple terrain piece pictured below is featured there. Run - do not walk - to check them out. The link above goes to information about the jungle piece, but it is easy to navigate around their site to see all they have to offer.


Thursday, December 18, 2008

Primitive Huts

Okay, these huts are just becoming available, although they have been discussed on The Miniatures Page (TMP) for over a year.
The sculptor (whose name I can't recall off the top of my head, but who goes by the TMP handle of Cacique Caribe, or CC) finished them, oh, November of 2007 I think. Then he shopped around for someone to handle the casting and marketing and such for him, as he didn't really want to do all of that himself, but there was a lot of interest in the models.

Enter Alex Bates in Alaska, of the new Forge of Ice company. They get a deal worked out, and now, they are in production.

First, a group shot. There are four different designs:


Now a close up of one:


I have nothing to do with the paint jobs (nice work, though, especially the snow) which were done I believe by a Mr Robert Phipps of the United Kingdom, a customer of Forge of Ice and friend of Alex's. I hope no one minds me swiping the photos, but I'll remove if you want me to!

I pinched this tidbit regarding the snow effect from TMP (http://theminiaturespage.com/)

"Regarding the snow effect, Rob [Phipp] says:

I Just use a bit of PVA wood glue on the bits I wanted covered in snow, then used a white flock, then another coat of PVA and then Bicarbonate of Soda for the snow effect. You get a nice brilliant crisp white from it.You don't have to use a white flock underneath but it stops any colour from the tent from showing through if your PVA is too thin.
And that's how he does it!

-Alex"

The reviews have been most complimentary, for both sculpting and quality of the production castings. You can reach Alex through his blog, and here's a link with more info and pictures of the tents. http://forum54.oli.us/index.php?topic=5205.15